> ## Documentation Index
> Fetch the complete documentation index at: https://docs.qu.ai/llms.txt
> Use this file to discover all available pages before exploring further.
# HiveOS Mining to a DePool
> Install and run a Quai GPU Miner to a DePool using HiveOS.
## Introduction
Here, we'll be installing [quai-gpu-miner](https://github.com/dominant-strategies/quai-gpu-miner), the implementation of a Quai Network ProgPOW miner. This tutorial focuses on installing and running quai-gpu-miner on [HiveOS](https://hiveon.com/os/) using a [Flight Sheet](https://hiveon.com/knowledge-base/guides/fs/). HiveOS also provides a web based dashboard for streamlined management and maintenance of your Quai Network GPU miner.
### Requirements
In order to mine to a DePool you will need the following requirements. If you don't know a DePool to connect to, you can run your own and earn fees when others use it!
## Environment Setup
### HiveOS
For this tutorial, you'll need a HiveOS machine. Instructions for how to install HiveOS on your rig and configure it can be found on the [HiveOS installation documentation](https://hiveon.com/install/).
### Dashboard
Once you've installed HiveOS, configure your GPU workers into a Farm. Once configured, you'll be able to manage workers from a [HiveOS dashboard](https://hiveon.com/knowledge-base/getting_started/start_dashboard_setup/) and utilize Flight Sheets.
### DePool Parameters
You will need to specify the following information to indicate your preferences to the DePool.
* **zone**: This is the IP address and port of the DePool you wish to connect to.
* **quaiCoinbase**: This is the coinbase address you want to mine to for Quai rewards.
* **qiCoinbase**: This is the coinbase address you want to mine to for Qi rewards.
* **minerPreference**: This is the relative preference between Quai and Qi from 0 to 1.
* **lockupByte**: This is the lockup duration you would like to mine for. Longer lockups receive higher yield.
## Installation
To start the Flight Sheet installation, open up your [HiveOS Farm Dashboard](https://the.hiveos.farm/).
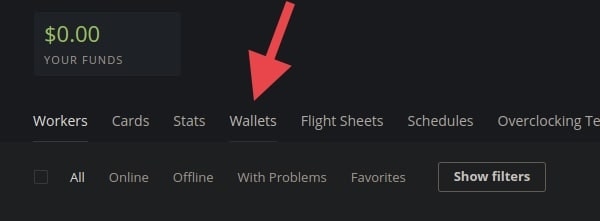
In the **farm menu**, click the *wallets* tab.
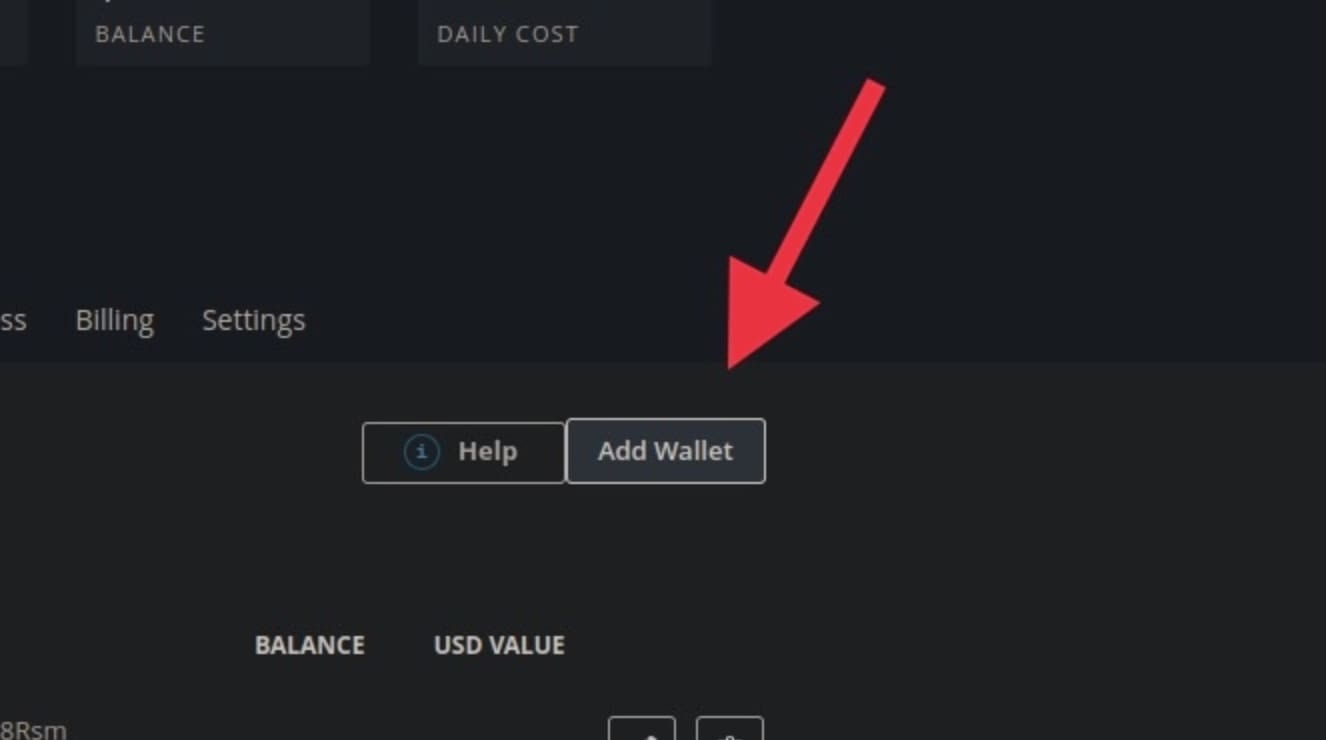
 On the right side of the page, click the *add wallet* button.
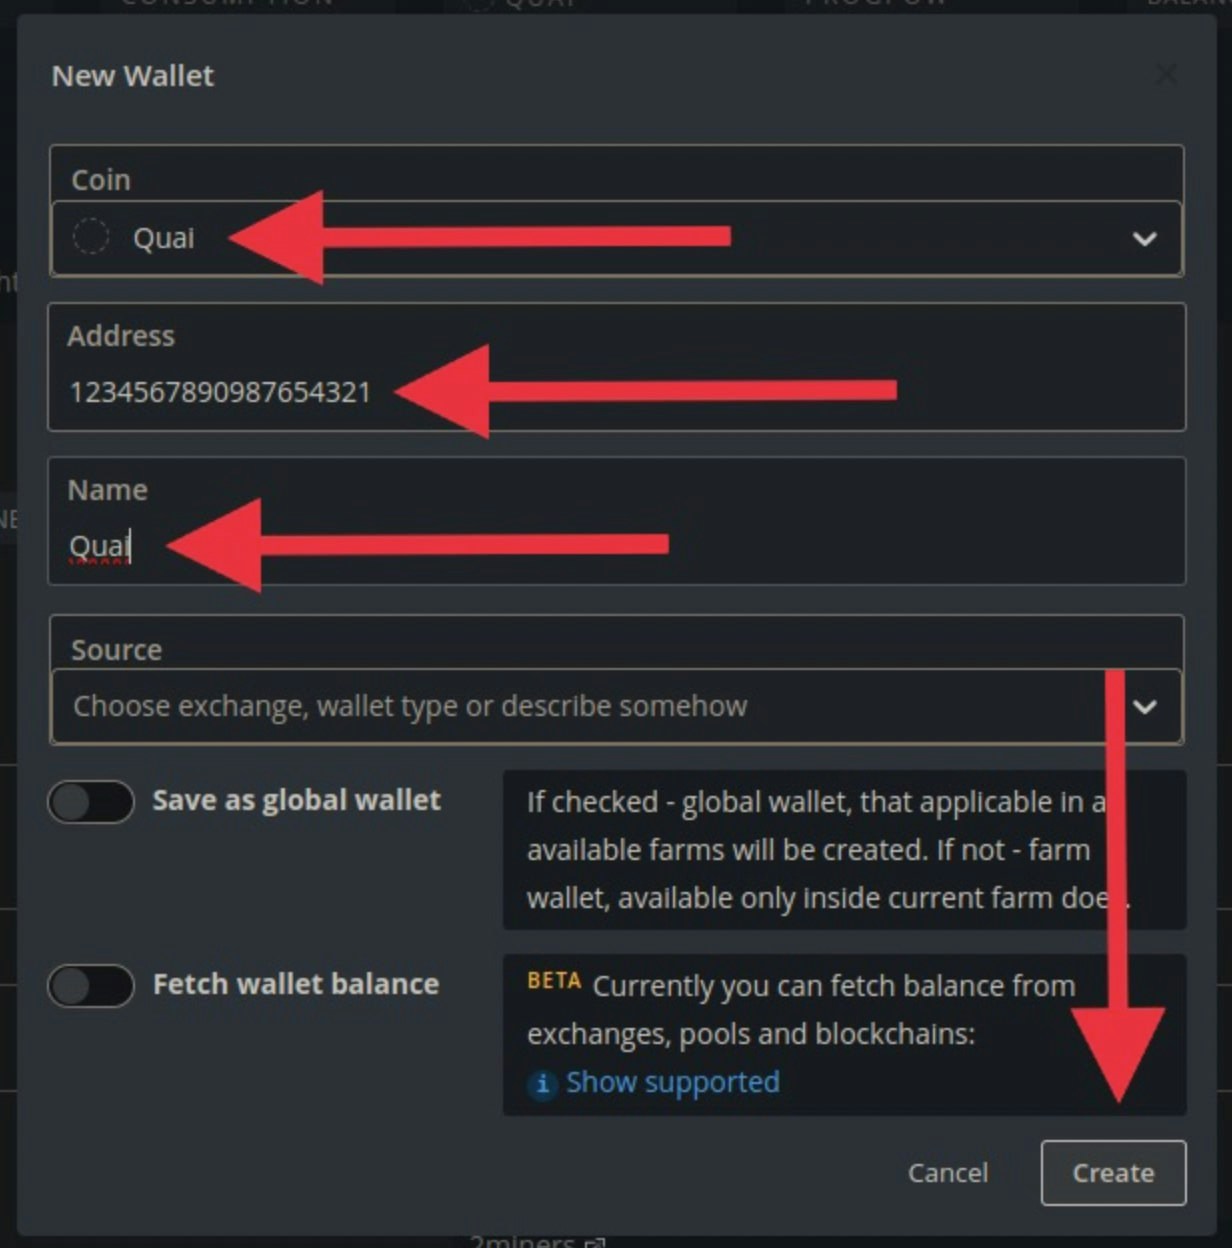
 Fill in the wallet information:
* For the **Coin** field, type `Quai` then click on the Quai option in the drop-down menu.
* In the **Address** field, copy/paste your Quai wallet address. (This address is not used by the miner, so you can put any address here.)
* For **Name** field, choose a name for your wallet.
To finish creating the wallet, click "Create" in the bottom right corner.
Fill in the wallet information:
* For the **Coin** field, type `Quai` then click on the Quai option in the drop-down menu.
* In the **Address** field, copy/paste your Quai wallet address. (This address is not used by the miner, so you can put any address here.)
* For **Name** field, choose a name for your wallet.
To finish creating the wallet, click "Create" in the bottom right corner.
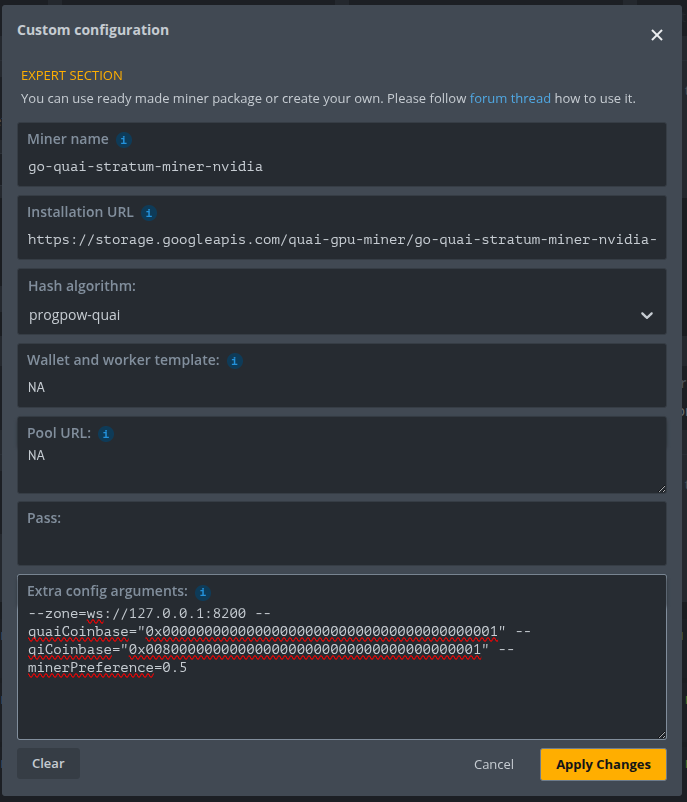
 In the **farm menu**, click the flight sheets tab.
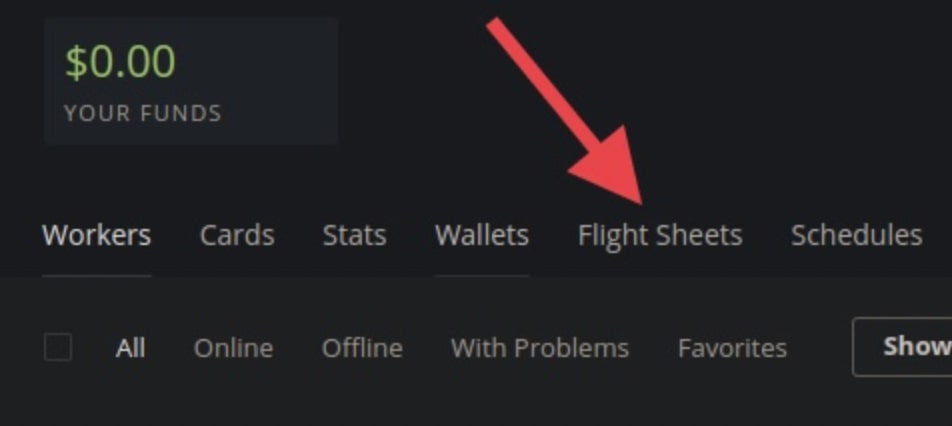 Click "add flight sheet". Fill out the flight sheet information:
* For the **Miner name**, leave it .
* For the **Installation URL**, paste in the URL for your card type:
```
https://storage.googleapis.com/quai-gpu-miner/go-quai-stratum-miner-nvidia-v0.8.0.tar.gz
```
AMD flight sheet will be coming soon! Let us know you need it in the discord.
* For the **Hash algorithm**, it should autopopulate as `quai-progpow`.
* For the **Wallet and worker template**, type `%WAL%.%WORKER_NAME%`.
* For the **Pool URL**, type `stratum://EXTERNALIPADDRESS:PORT`.
For the **Extra config arguments**, you will enter the parameters you defined earlier. For example:
```
--zone=ws://127.0.0.1:8200 --quaiCoinbase="0x0000000000000000000000000000000000000001" --qiCoinbase="0x0080000000000000000000000000000000000001" --minerPreference=0.5
```
AMD flight sheet will be coming soon! Let us know you need it in the discord.
On bottom right corner, click "Apply Changes".
Click "add flight sheet". Fill out the flight sheet information:
* For the **Miner name**, leave it .
* For the **Installation URL**, paste in the URL for your card type:
```
https://storage.googleapis.com/quai-gpu-miner/go-quai-stratum-miner-nvidia-v0.8.0.tar.gz
```
AMD flight sheet will be coming soon! Let us know you need it in the discord.
* For the **Hash algorithm**, it should autopopulate as `quai-progpow`.
* For the **Wallet and worker template**, type `%WAL%.%WORKER_NAME%`.
* For the **Pool URL**, type `stratum://EXTERNALIPADDRESS:PORT`.
For the **Extra config arguments**, you will enter the parameters you defined earlier. For example:
```
--zone=ws://127.0.0.1:8200 --quaiCoinbase="0x0000000000000000000000000000000000000001" --qiCoinbase="0x0080000000000000000000000000000000000001" --minerPreference=0.5
```
AMD flight sheet will be coming soon! Let us know you need it in the discord.
On bottom right corner, click "Apply Changes".