> ## Documentation Index
> Fetch the complete documentation index at: https://docs.qu.ai/llms.txt
> Use this file to discover all available pages before exploring further.
# 使用 HiveOS 进行 KawPoW 挖矿
> 使用 Flight Sheet 在 HiveOS 上安装并运行 GPU 矿工。
## 简介
在本指南中,我们将使用 [Flight Sheet](https://hiveon.com/knowledge-base/guides/fs/) 在 [HiveOS](https://hiveon.com/os/) 上安装并运行 [SRBMiner-Multi](https://github.com/doktor83/SRBMiner-Multi)。HiveOS 还提供了基于 Web 的仪表盘,用于对你的 Quai Network GPU 矿机进行高效的管理和维护。
### 需求
为了在 HiveOS 上运行 quai-gpu-miner 并成功挖出有效区块,你需要满足以下条件:
## 环境设置
### HiveOS
在本教程中,你需要一台 HiveOS 设备。关于如何在矿机上安装并配置 HiveOS 的说明,请参考 [HiveOS 安装文档](https://hiveon.com/install/)。
### 仪表盘
安装好 HiveOS 后,将你的 GPU Worker 配置到一个 Farm 中。配置完成后,你可以通过 [HiveOS 仪表盘](https://hiveon.com/knowledge-base/getting_started/start_dashboard_setup/) 来管理 Worker,并使用 Flight Sheets。
## 安装
要开始 Flight Sheet 的安装,请打开你的 [HiveOS Farm 仪表盘](https://the.hiveos.farm/)。
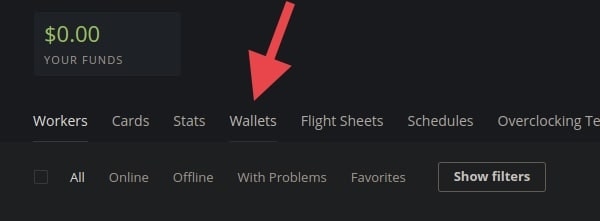
在 **Farm 菜单** 中,点击 *wallets*(钱包)选项卡。
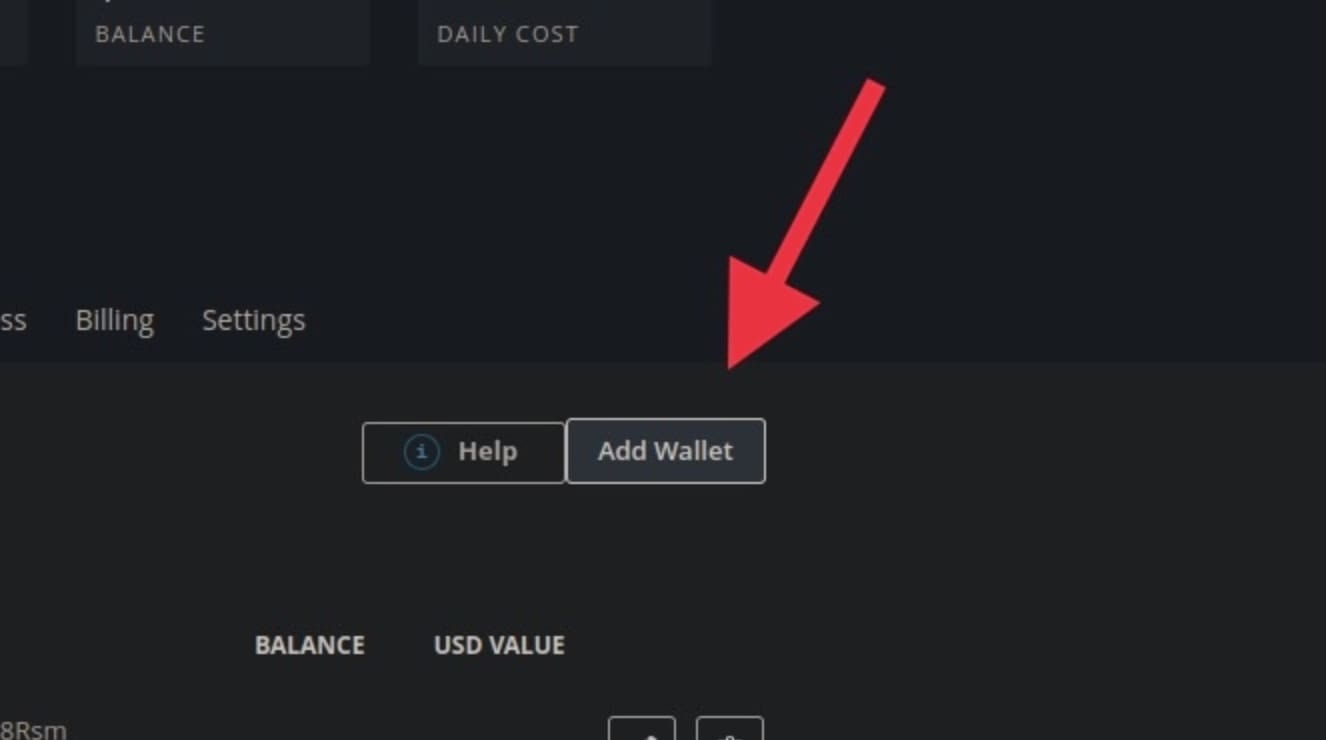
 在页面右侧,点击 *add wallet*(添加钱包)按钮。
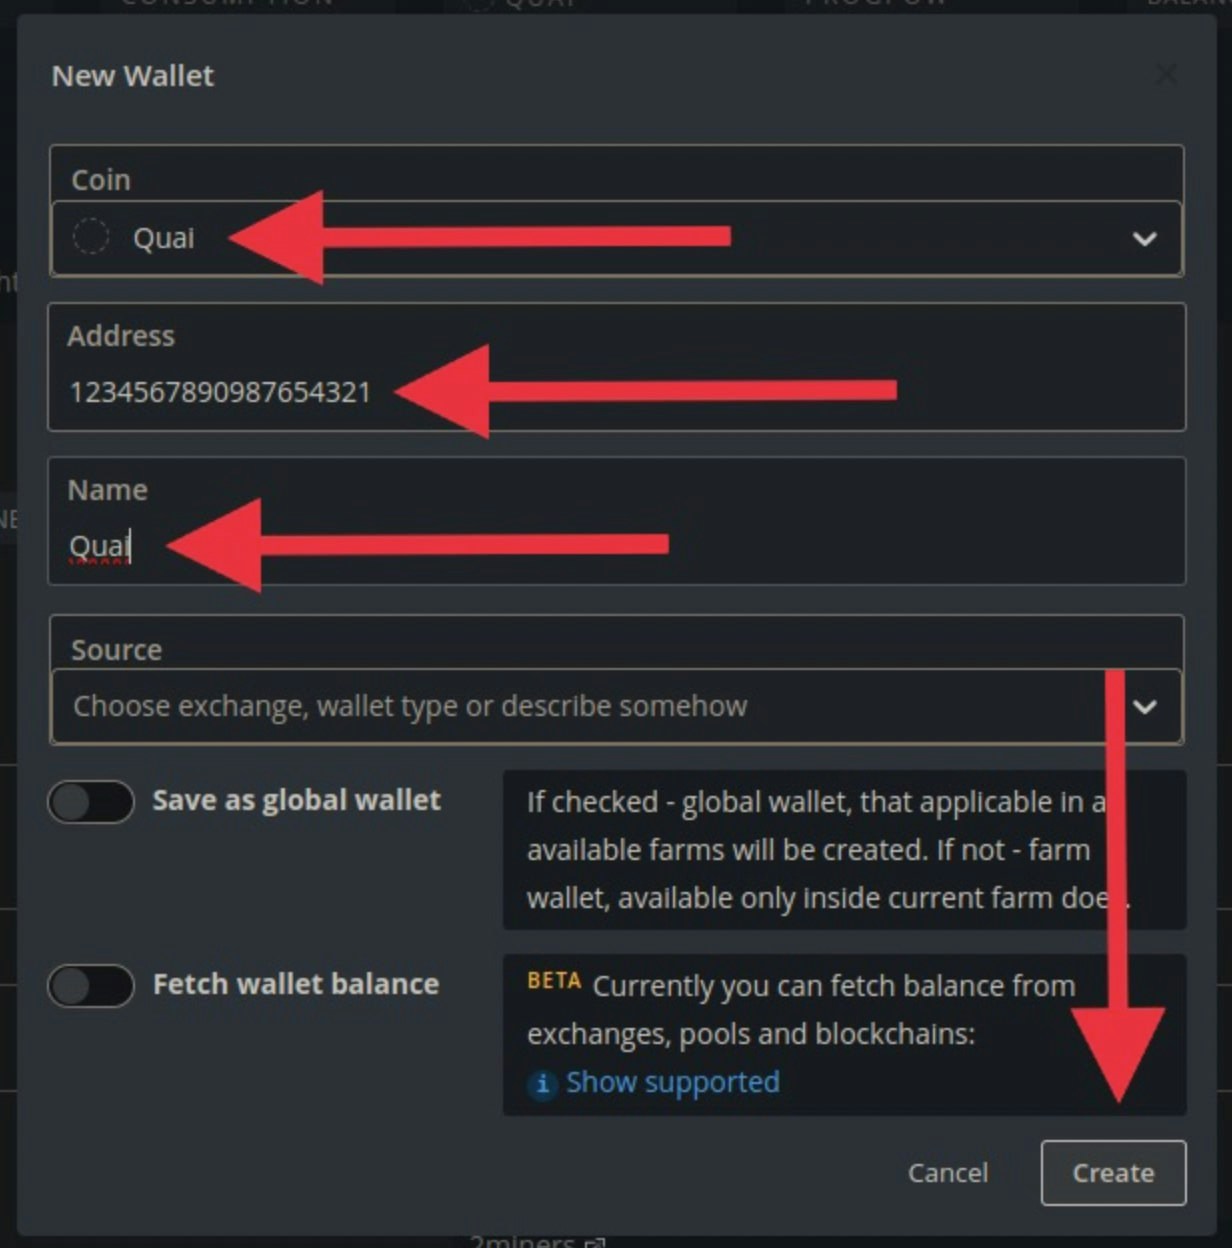
 填写钱包信息:
* 在 **Coin**(币种)字段中,输入 `Quai`,然后在下拉菜单中点击 *Create Quai*。
* 在 **Address**(地址)字段中,复制并粘贴你的 Quai 钱包地址。(该地址不会被矿工实际使用,因此这里可以填写任意地址。)
* 在 **Name**(名称)字段中,为你的钱包选择一个名称。
填写完成后,点击右下角的 “Create”(创建)以完成钱包创建。
填写钱包信息:
* 在 **Coin**(币种)字段中,输入 `Quai`,然后在下拉菜单中点击 *Create Quai*。
* 在 **Address**(地址)字段中,复制并粘贴你的 Quai 钱包地址。(该地址不会被矿工实际使用,因此这里可以填写任意地址。)
* 在 **Name**(名称)字段中,为你的钱包选择一个名称。
填写完成后,点击右下角的 “Create”(创建)以完成钱包创建。
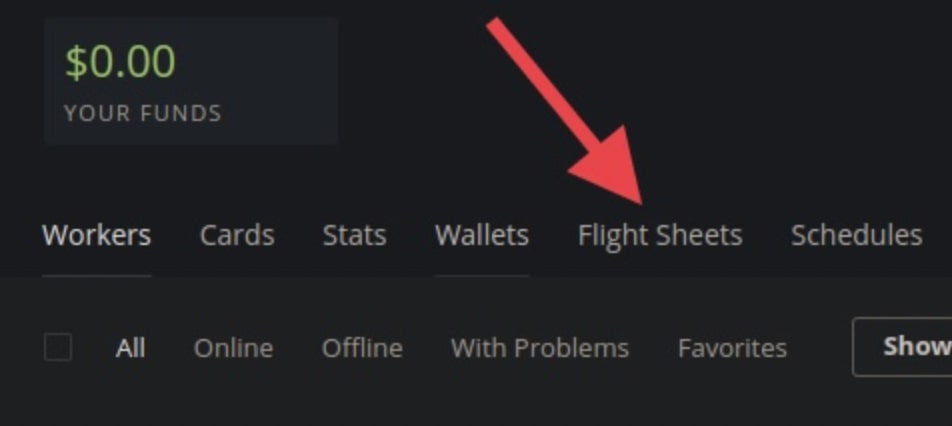
 在 **Farm 菜单** 中,点击 *flight sheets*(飞行表)选项卡。
 点击 “add flight sheet”(添加飞行表),并填写相关信息:
* Coin 选择 `Quai`。
* Wallet 选择你刚刚配置的钱包。
* Pool 选择 `Configure in miner`(在矿工中配置)。
* **Miner name**(矿工名称)选择 `SRBMiner-MULTI`。
接着,点击位于 `SRBMiner-MULTI` 上方的 `Setup Miner Config`(设置矿工配置)。
点击 “add flight sheet”(添加飞行表),并填写相关信息:
* Coin 选择 `Quai`。
* Wallet 选择你刚刚配置的钱包。
* Pool 选择 `Configure in miner`(在矿工中配置)。
* **Miner name**(矿工名称)选择 `SRBMiner-MULTI`。
接着,点击位于 `SRBMiner-MULTI` 上方的 `Setup Miner Config`(设置矿工配置)。
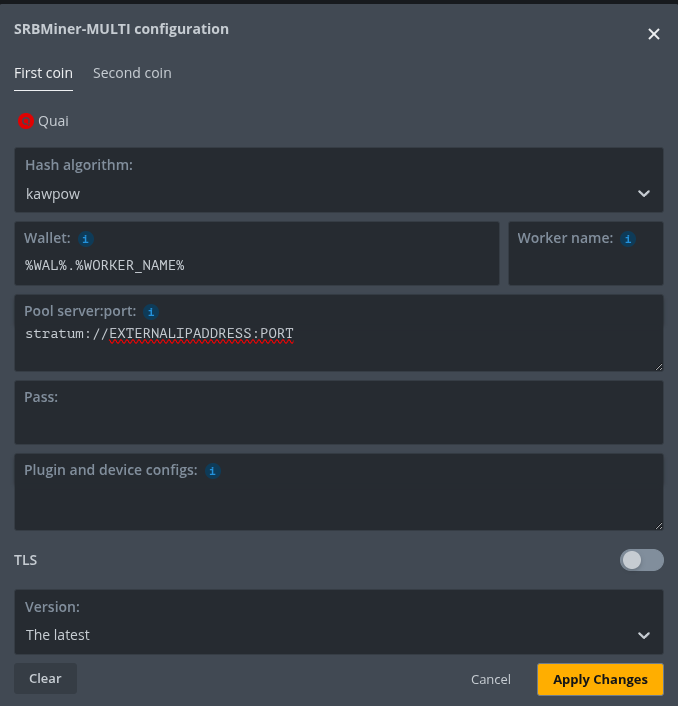
 配置 SRBMiner:
* 将 Hash algorithm(哈希算法)设置为 `kawpow`。
* Wallet 设置为 `%WAL%.%WORKER_NAME%`。
* 在 **Pool URL** 中填写 `stratum://EXTERNALIPADDRESS:PORT`,将 EXTERNALIPADDRESS 和 PORT 替换为你的 Stratum 代理 IP 地址和端口。
配置 SRBMiner:
* 将 Hash algorithm(哈希算法)设置为 `kawpow`。
* Wallet 设置为 `%WAL%.%WORKER_NAME%`。
* 在 **Pool URL** 中填写 `stratum://EXTERNALIPADDRESS:PORT`,将 EXTERNALIPADDRESS 和 PORT 替换为你的 Stratum 代理 IP 地址和端口。
 在右下角点击 “Apply Changes”(应用更改)。
矿工配置完成后,为你的 Flight Sheet 命名,然后点击 `Create Flight Sheet`(创建飞行表)。
在右下角点击 “Apply Changes”(应用更改)。
矿工配置完成后,为你的 Flight Sheet 命名,然后点击 `Create Flight Sheet`(创建飞行表)。
 ## 启动 Flight Sheet
开始挖矿的步骤如下:
* 访问你在 HiveOS 中的 Worker 页面。
* 切换到 Flight Sheet 选项卡。
* 启动你刚刚创建的 Flight Sheet。
## 启动 Flight Sheet
开始挖矿的步骤如下:
* 访问你在 HiveOS 中的 Worker 页面。
* 切换到 Flight Sheet 选项卡。
* 启动你刚刚创建的 Flight Sheet。
 HiveOS 需要几秒钟时间在你的 Worker 设备上安装并运行 Flight Sheet。启动后,SRBMiner 会先执行自动调优(auto-tune)过程,然后进入稳定状态,并以最佳性能开始挖矿。
如果你已登录到 HiveOS Worker,你应该会看到类似如下的输出。如果没有看到,只需运行命令 `hive-console` 来打开正确的视图。
HiveOS 需要几秒钟时间在你的 Worker 设备上安装并运行 Flight Sheet。启动后,SRBMiner 会先执行自动调优(auto-tune)过程,然后进入稳定状态,并以最佳性能开始挖矿。
如果你已登录到 HiveOS Worker,你应该会看到类似如下的输出。如果没有看到,只需运行命令 `hive-console` 来打开正确的视图。
 现在,你已经成功使用 HiveOS 和 SRB Miner,通过 KawPoW 算法在 GPU 上挖掘 Quai 了!